Nodes
Manage your measurement nodes, API keys, and alert thresholds.
Overview
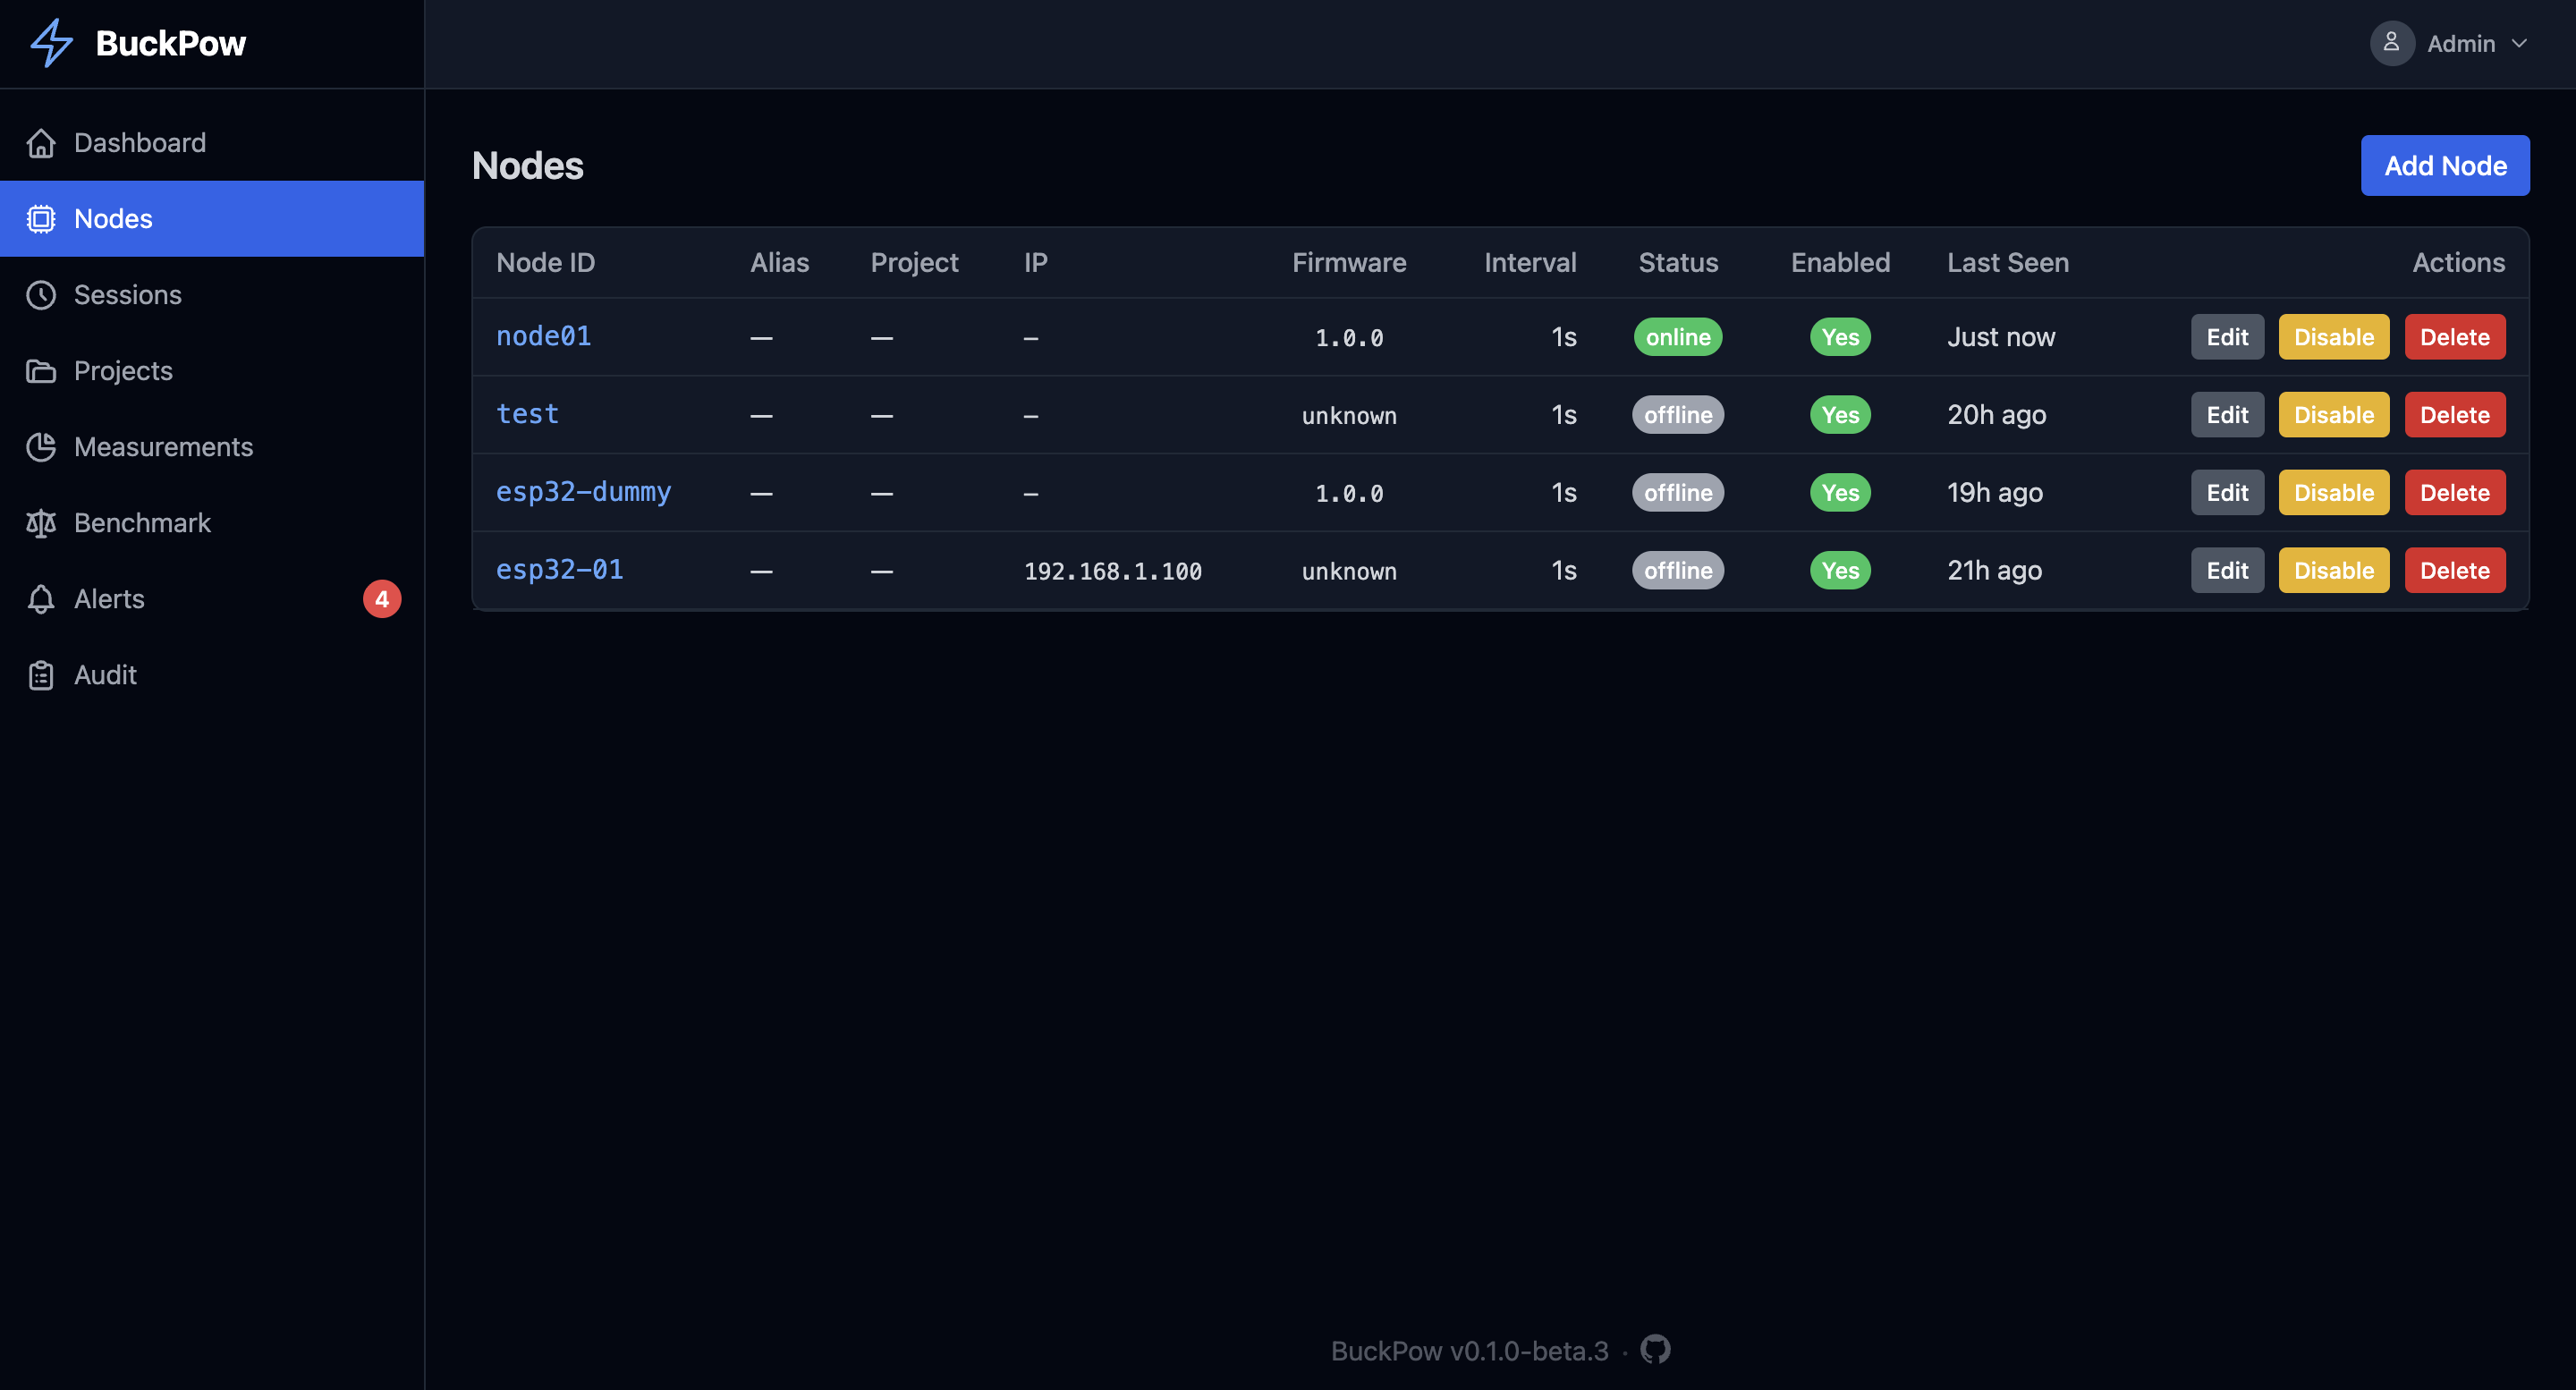
The Nodes page lists all registered nodes with their status, configuration, and API keys. Nodes can be created manually or registered automatically when they send their first measurement.
Navigate to Nodes in the sidebar.
Node List
The node table shows:
| Column | Description |
|---|---|
| Status | Online (green) or offline (gray) indicator |
| Node ID | Unique identifier (e.g., esp32-01) |
| Alias | Friendly name (optional) |
| Project | Assigned project name |
| Sampling Interval | Measurement frequency in seconds |
| Firmware | Reported firmware version |
| API Key | Masked key (first 6 + **** + last 4) |
| Last Seen | Timestamp of last received measurement |
| Actions | Edit, toggle, regenerate key, delete |
Node Status
A node is marked as online if it has sent a measurement within the last 30 seconds (configurable via DEVICE_ONLINE_TIMEOUT). Otherwise it is offline.
Status is dynamic
Status is computed in real-time from last_seen. It is not stored in the database.
Pagination
Nodes are paginated at 10 per page. Use the page navigation at the bottom of the table.
Creating a Node
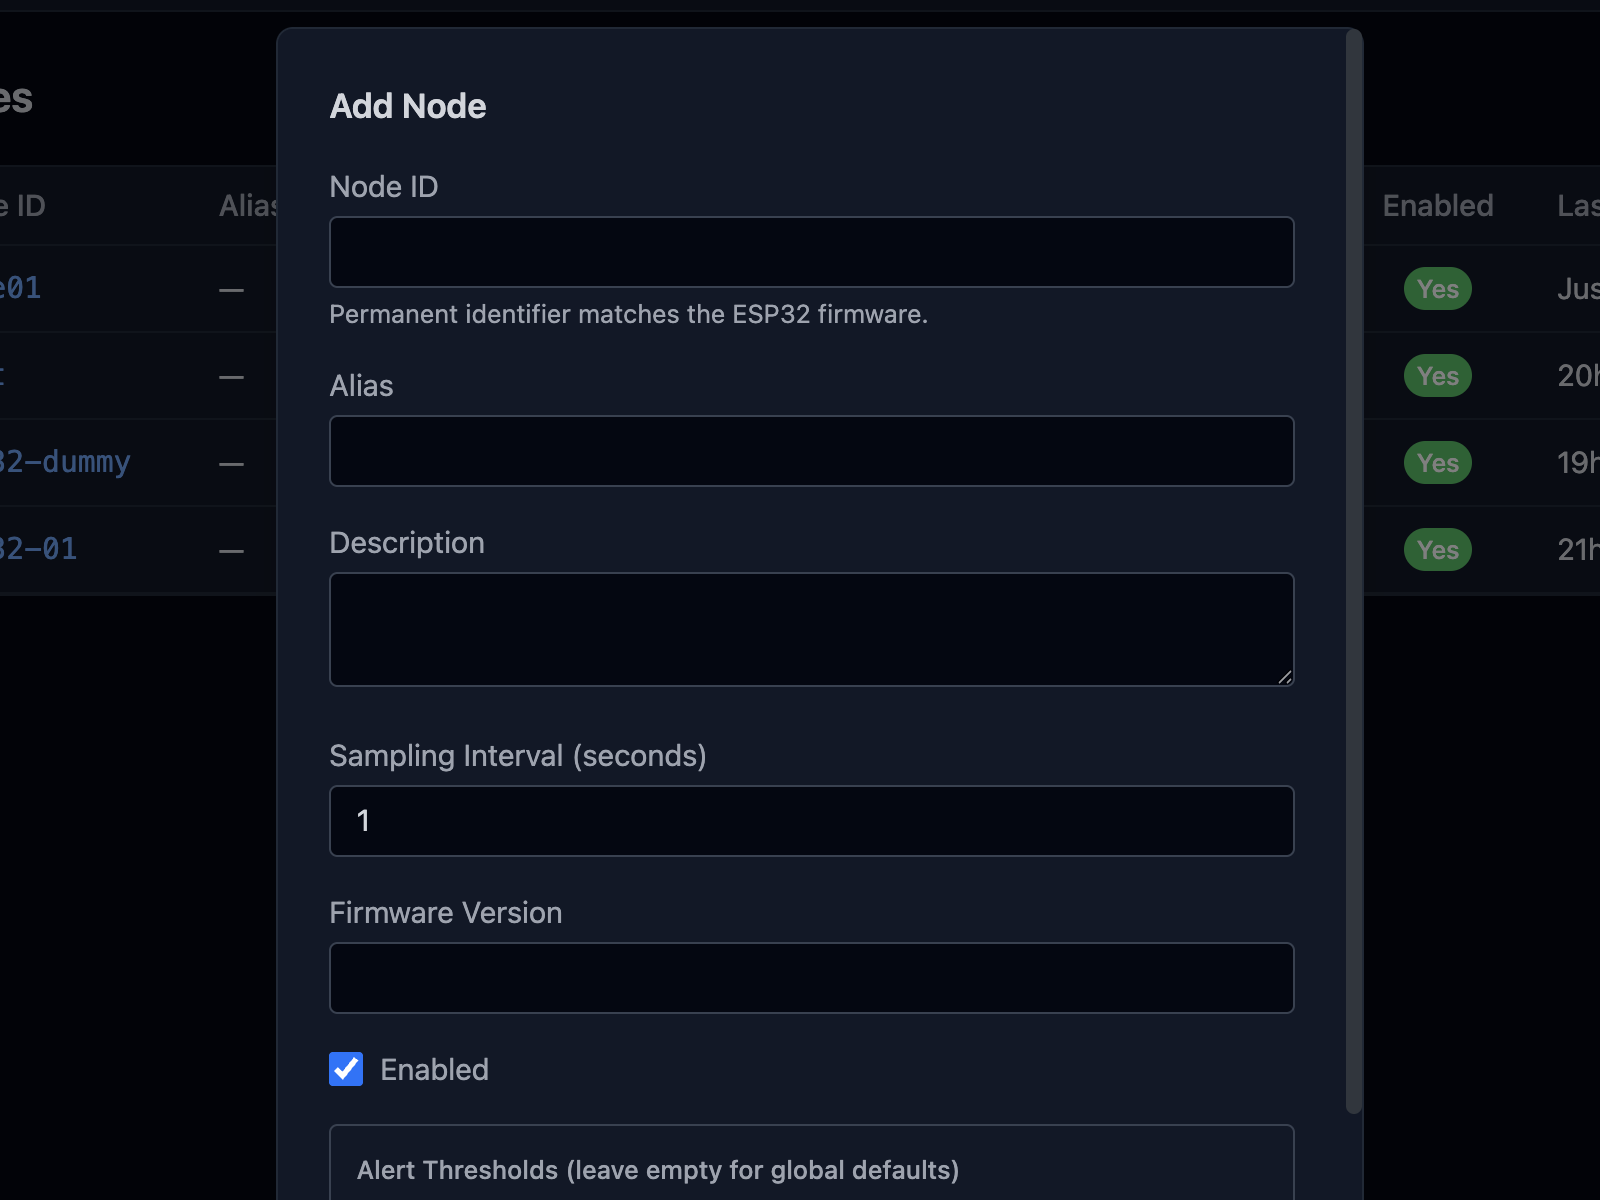
Manual Creation
- Click Add Node button on the Nodes page
- Fill in the form:
| Field | Required | Description |
|---|---|---|
| Node ID | Yes | Unique identifier (e.g., esp32-01) |
| Alias | No | Friendly name for display |
| Description | No | Notes about the device |
| Project | No | Assign to a project |
| Sampling Interval | No | Seconds between measurements (default: 1) |
| Firmware Version | No | Firmware version string |
| High Current Threshold | No | Alert when current exceeds this value (A) |
| High Power Threshold | No | Alert when power exceeds this value (W) |
| Low Voltage Threshold | No | Alert when voltage drops below this value (V) |
- Click Save
An API key is generated automatically.
Auto-Registration
When a node sends a measurement with an unknown device_id, BuckPow automatically creates a new node with:
device_idfrom the measurement payload- Default sampling interval from
DEFAULT_SAMPLING_INTERVAL - A generated API key
- Status: offline (until next measurement)
Zero-config setup
Just point your ESP32/ESP8266 at the BuckPow API and it will register itself.
Editing a Node
- Click the Edit button (pencil icon) on the node row
- Modify any field
- Click Save
Changes are logged to the audit trail.
API Keys
Each node has a unique 64-character hex API key used for authentication.
Viewing the Full API Key
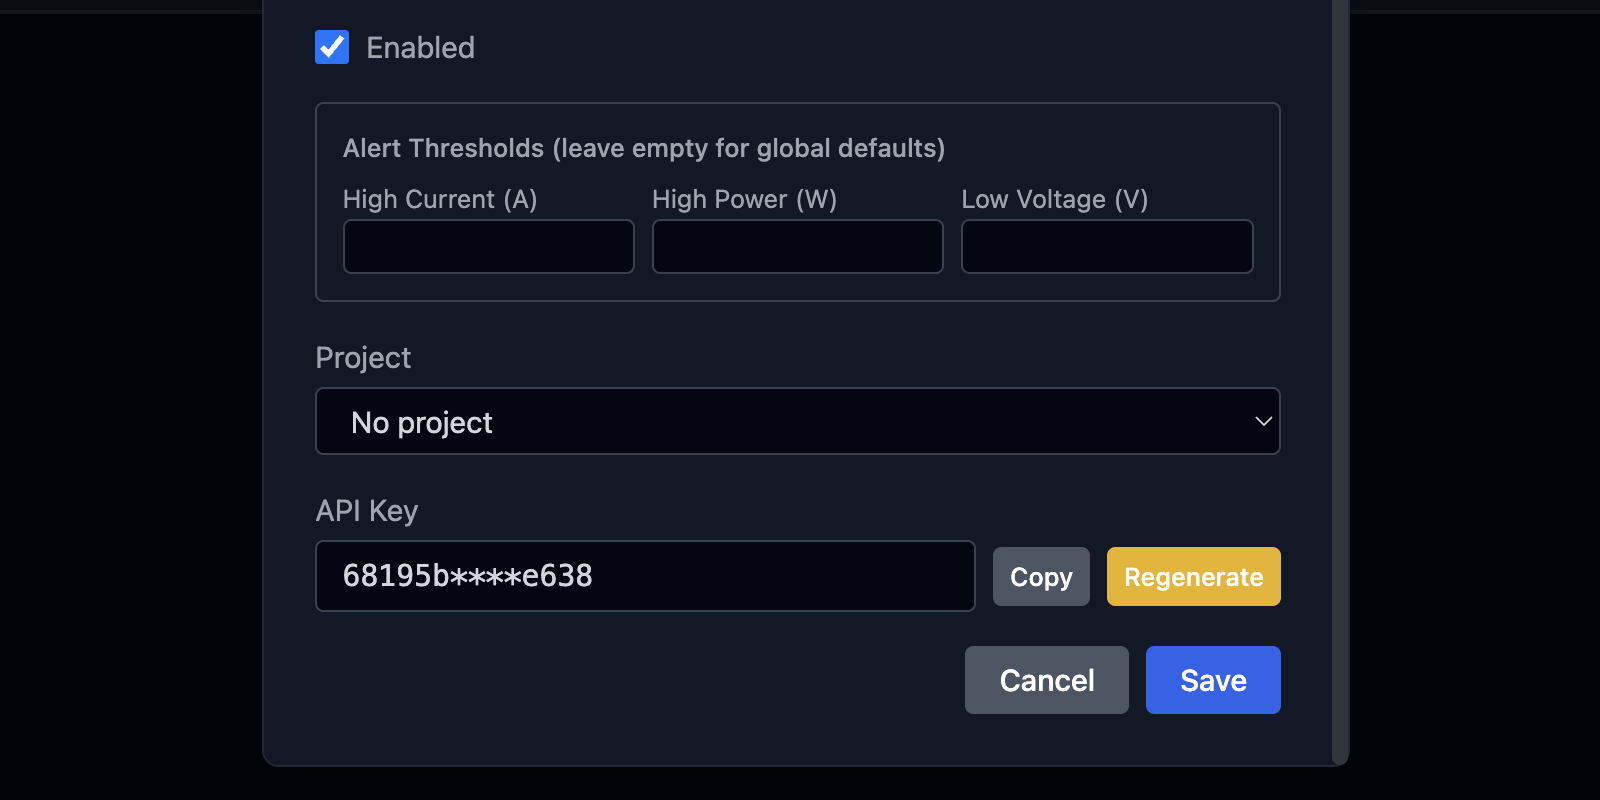
- Click Edit on the node row
- Scroll down to the API Key section
- The full key is displayed in a read-only field
- Click Copy to copy the key to your clipboard
Keep keys secret
Anyone with the full API key can send measurements to your node. Treat it like a password.
Regenerating a Key
- Click Edit on the node row
- Scroll down to the API Key section
- Click Regenerate
- Confirm the action
- The old key is immediately invalidated
Breaks existing nodes
After regenerating, update the API key on all physical nodes using this key. Measurements with the old key will fail.
Using the API Key
Include the key in the Authorization header:
curl -X POST http://localhost:8000/api/v1/measurements \
  -H 'Content-Type: application/json' \
  -H 'Authorization: Bearer <your-api-key>' \
  -d '{"device_id":"esp32-01","bus_voltage":5.0,"shunt_voltage":50,"current":150,"power":750}'
Disabling Node Authentication
To allow nodes to send measurements without an API key:
When disabled, the device_id from the payload is used for node lookup.
Enabling / Disabling a Node
Click the Toggle button (power icon) to enable or disable a node.
- Enabled: Node can receive measurements and appears in dashboards
- Disabled: Node is ignored; measurements are rejected
Alert Thresholds
Configure per-node thresholds to trigger automatic alerts:
| Threshold | Unit | Alert When |
|---|---|---|
| High Current | Amps (A) | Current exceeds threshold |
| High Power | Watts (W) | Power exceeds threshold |
| Low Voltage | Volts (V) | Voltage drops below threshold |
Alerts are generated automatically when measurements exceed these values. They appear on the Alerts page.
Setting Thresholds
- Edit the node
- Enter values in the threshold fields
- Save
Thresholds can also be set as global defaults in Settings.
Deleting a Node
- Click the Delete button (trash icon) on the node row
- Confirm the deletion
Permanent action
Deleting a node removes all its measurements, sessions, and alerts. This cannot be undone.
Node API Reference
| Method | Endpoint | Description |
|---|---|---|
GET |
/api/v1/devices |
List nodes (paginated) |
POST |
/api/v1/devices |
Create a new node |
GET |
/api/v1/devices/{id} |
Get node details |
PUT |
/api/v1/devices/{id} |
Update node |
DELETE |
/api/v1/devices/{id} |
Delete node |
GET |
/api/v1/devices/{id}/key |
Get full API key |
PATCH |
/api/v1/devices/{id}/toggle |
Enable/disable node |
PATCH |
/api/v1/devices/local-ip |
Update device local IP (device auth) |
POST |
/api/v1/devices/{id}/regenerate-key |
Generate new API key |
Example: Create Node
curl -X POST http://localhost:8000/api/v1/devices \
  -H 'Content-Type: application/json' \
  -H 'Authorization: Bearer <jwt-token>' \
  -d '{
    "device_id": "esp32-02",
    "alias": "Sensor Lab",
    "description": " INA219 on power supply",
    "sampling_interval": 5,
    "high_power_threshold": 10.0
  }'
Example: List All Nodes
Example: Get API Key
Response: